QuickBooks Setup
Set up your Intuit account and configure the QuickBooks Developer Portal for connecting with Shopify
Before connecting your Shopify store to QuickBooks, you need to set up your Intuit account and configure the QuickBooks Developer Portal. Follow these steps to get everything ready.
Step 1: Go to the Intuit Developer Portal
Visit the Intuit Developer Portal to get started:
If you already have an Intuit account, proceed to Step 3: Sign In. If not, continue to Step 2 to create an account.
Step 2: Create an Intuit Account
If you are new to Intuit, click Create an account on the sign-in page. Fill in the required details:
- Email address
- First name
- Last name
- Password
- Phone number

Click Create an Intuit Account to proceed. Intuit may send a verification code to your email or phone to confirm your identity.
Step 3: Sign In to Intuit
If you already have an account, enter your credentials on the sign-in page:
- Email or user ID
- Password
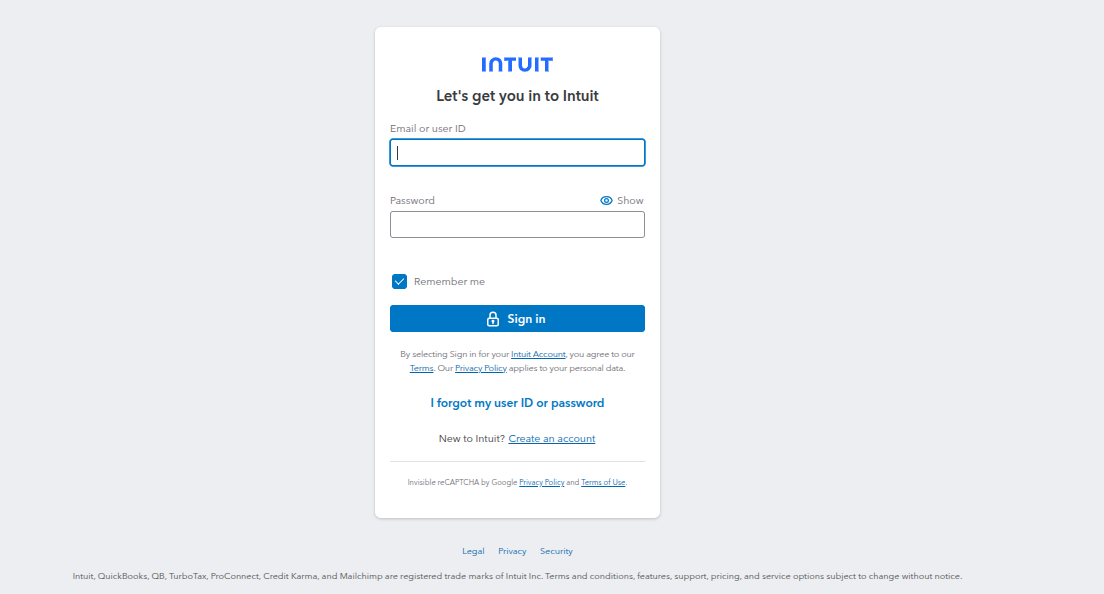
Click Sign in to access the Intuit Developer Portal.
Step 4: Create a Workspace and App
After signing in, you will land on the Workspaces page. Here you can see your existing apps or create a new one.
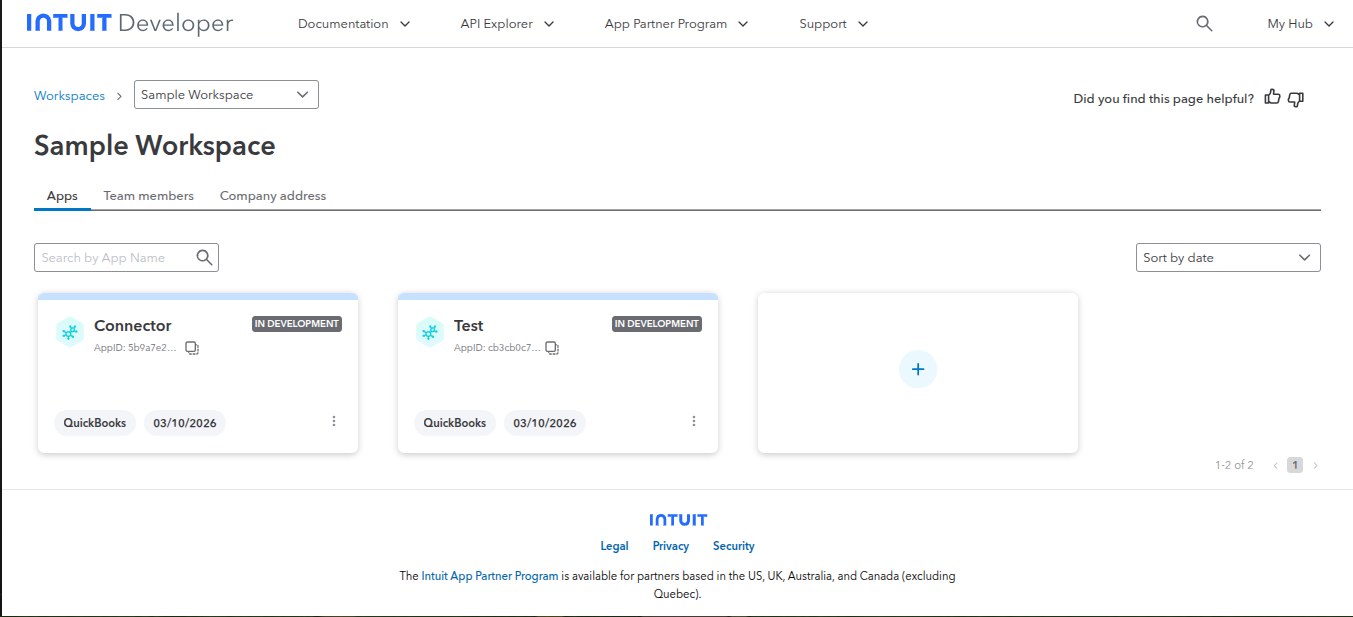
To create a new app:
- Click the + button to create a new app
- Select QuickBooks as the platform
- Give your app a name (e.g., "Connector")
- Click Create to set up the app
If you already have an app, click on it to open the App Overview page.
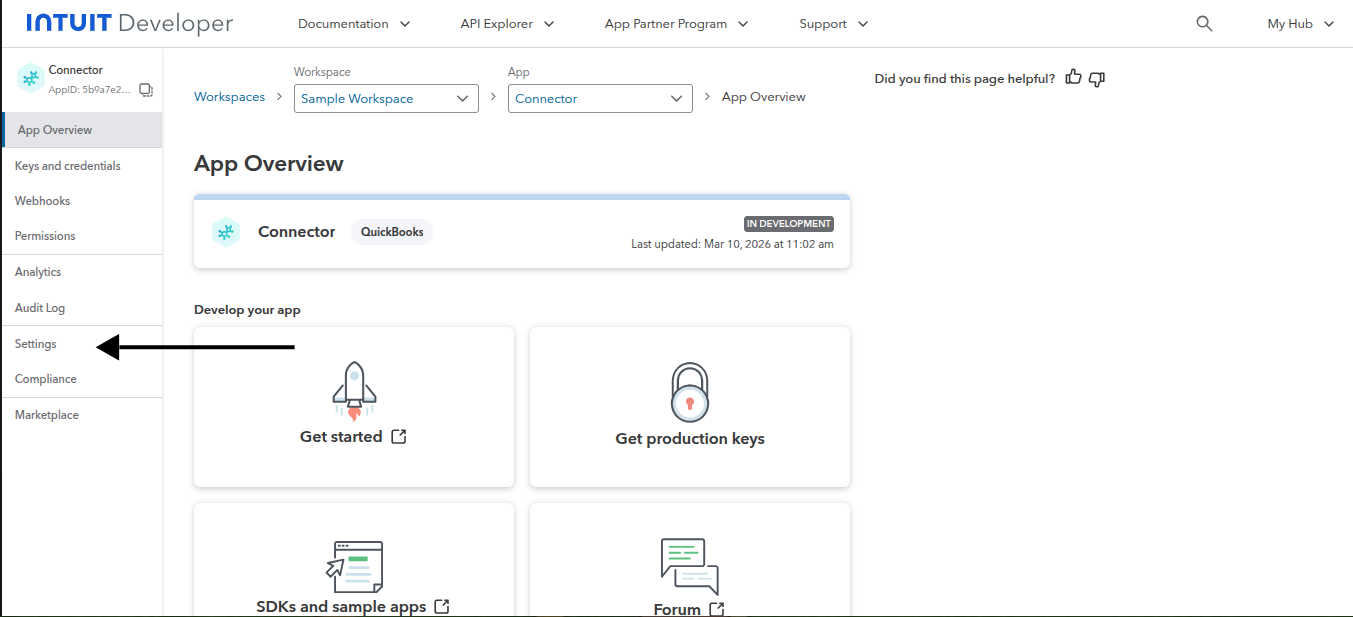
Step 5: Go to Settings
On the App Overview page, you will see the left sidebar with navigation options. Click Settings to access the app configuration.
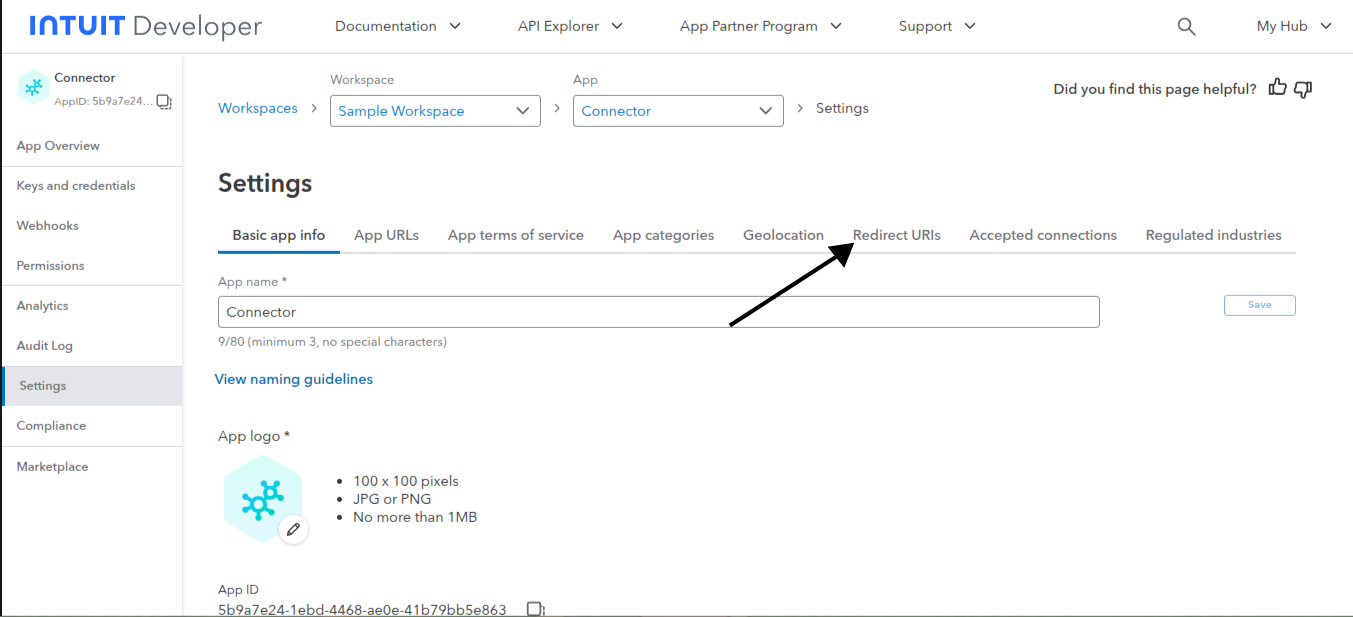
Step 6: Navigate to Redirect URIs
In the Settings page, you will see multiple tabs at the top. Click the Redirect URIs tab to configure the redirect URL for OAuth authentication.
Step 7: Copy the Redirect URL from QuickBooks Connector App
Now go to your Shopify admin and open the QuickBooks Connector app. Click the Manual Setup tab.
You will see the QuickBooks Redirect URL at the top of the form. Click the copy icon to copy this URL to your clipboard.
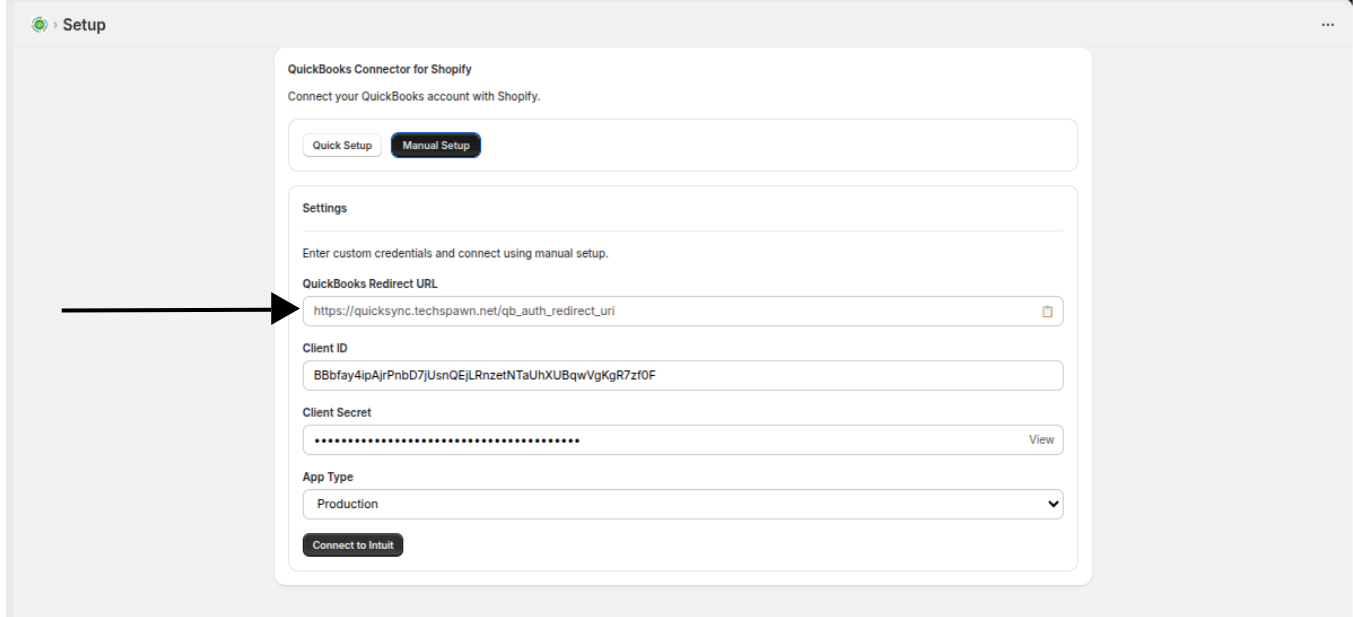
The redirect URL will look like:
https://quicksync.techspawn.net/qb_auth_redirect_uriStep 8: Add the Redirect URL and Save
Go back to the Intuit Developer Portal in the Redirect URIs tab:
- Select the environment — Development or Production (choose based on your intended setup)
- Paste the redirect URL you copied from the QuickBooks Connector app
- Click Save to save the redirect URI
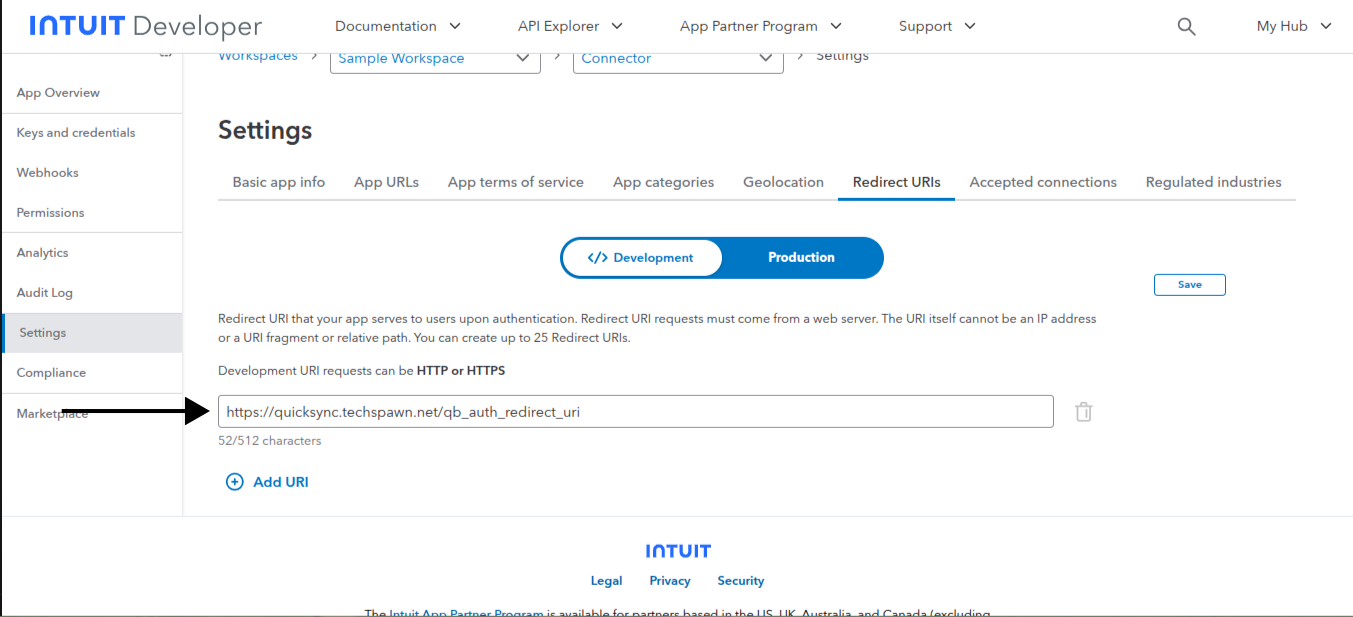
The redirect URL must match exactly with the URL shown in the QuickBooks Connector app. Any mismatch will cause the connection to fail.
If you are using Development (Sandbox) keys, add the URL under the Development tab. For Production keys, add it under the Production tab.
What's Next?
Your Intuit Developer Portal is now configured. You can connect your QuickBooks account to Shopify using one of two methods:
- Quick Setup — One-click connection. Best for most users.
- Manual Setup — Use your own Client ID and Client Secret from the Intuit Developer Portal. Best for custom configurations.